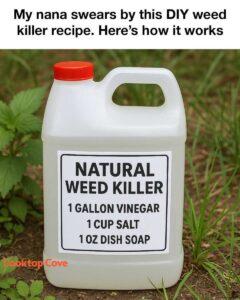
My Nana Swears By This DIY Weed Killer Recipe
Introduction
Weeds are every gardener’s worst nightmare—sprouting up uninvited, choking your flowers, and stealing nutrients from the soil meant for your prized plants. While commercial weed killers promise quick fixes, they often come loaded with harsh chemicals that do more harm than good. They can poison the soil, endanger pollinators, and even put your pets and kids at risk.
That’s why My Nana Swears By This DIY Weed Killer Recipe, a natural, budget-friendly, and incredibly effective solution made from simple household ingredients. It’s safe, easy to make, and surprisingly powerful. This tried-and-true formula has been in our family for generations, and it continues to outperform store-bought alternatives when it comes to keeping unwanted growth under control.
In this guide, we’ll explore why this natural approach works so well, the science behind each ingredient, how to mix and apply it for maximum effectiveness, and a few additional eco-friendly tips to keep your garden thriving.
Why This Recipe Works
If you’ve ever wondered why My Nana Swears By This DIY Weed Killer Recipe, the answer lies in its brilliant simplicity. Unlike synthetic herbicides that rely on complicated chemical reactions, this recipe uses three common ingredients—vinegar, salt, and dish soap—that each play a specific role in destroying weeds naturally.
Vinegar (Acetic Acid) – The backbone of the formula, vinegar works by breaking down plant cell membranes. This dries out the weed from the inside, leaving it wilted within hours of application. Horticultural vinegar (20–30% acidity) delivers even faster results for tougher or mature weeds.
Salt (Sodium Chloride) – Salt acts as a natural desiccant. It dehydrates weeds and disrupts their ability to absorb moisture, ensuring they don’t regrow easily. However, moderation is key—too much salt can harm surrounding soil health.
Dish Soap (Surfactant) – The unsung hero of this mix, dish soap helps the vinegar-and-salt solution cling to weed leaves. It breaks down the plant’s natural waxy surface, allowing the liquid to penetrate faster and work more efficiently.
Together, these ingredients form a safe, affordable, and eco-conscious alternative that explains why My Nana Swears By This DIY Weed Killer Recipe instead of using expensive chemical sprays. It’s not only effective but also sustainable for long-term use in any home garden.
What You’ll Need For This Recipe
Making My Nana Swears By This DIY Weed Killer Recipe requires just a few everyday items you likely already have in your kitchen or garage. No special tools or hard-to-find materials are needed.
Ingredients
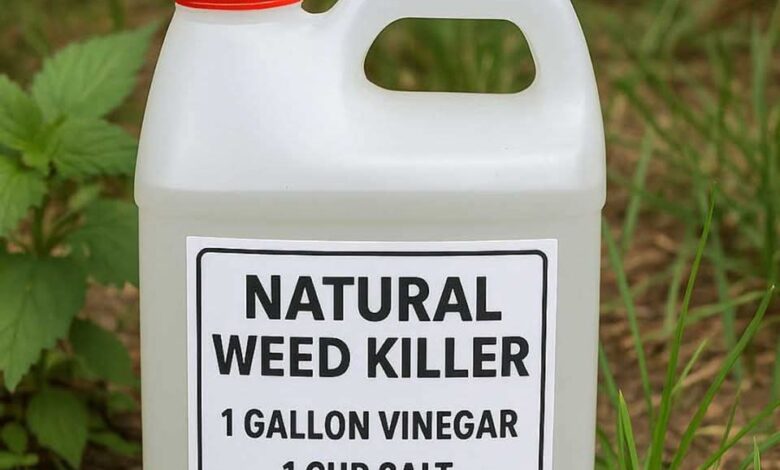
1 gallon white vinegar – Regular 5% acidity works for mild weeds, but for stubborn, deep-rooted weeds, horticultural vinegar (20%) is ideal.
1 cup table salt or Epsom salt – Table salt delivers maximum punch, but Epsom salt is gentler on soil and still effective.
1 tablespoon liquid dish soap – Any mild dish soap will do; its job is to help the mixture stick to leaves for better absorption.
Tools
Large mixing bucket – To combine ingredients safely.
Spray bottle or garden sprayer – Depending on whether you’re treating small patches or large areas.
Protective gloves and eyewear – Vinegar and salt can irritate skin and eyes.
Measuring cup and spoon – For accurate ratios.
When you have these on hand, you’re ready to mix and use the same eco-friendly solution that has kept Nana’s garden lush for decades.
How To Make This Recipe
Now let’s dive into the step-by-step process of My Nana Swears By This DIY Weed Killer Recipe. The key to success lies not just in mixing the right ingredients, but also in when and how you apply them.
Step 1: Mix the Ingredients
In a large bucket, pour one gallon of vinegar. Slowly stir in one cup of salt until it fully dissolves. Finally, add one tablespoon of liquid dish soap and gently stir again. This ensures the surfactant is evenly distributed.
Step 2: Transfer to a Sprayer
Pour the mixture into a clean spray bottle or garden sprayer. Label it clearly so it’s not mistaken for a cleaning product.
Step 3: Choose the Right Day
Timing is everything. Apply My Nana Swears By This DIY Weed Killer Recipe on a hot, sunny day when there’s no rain forecast for at least 24 hours. The heat amplifies vinegar’s drying effect, while dry conditions prevent dilution or runoff.
Step 4: Apply Carefully
Spray the solution directly on the leaves of weeds, coating them thoroughly but avoiding any desirable plants. This is a non-selective weed killer—it doesn’t distinguish between weeds and your favorite flowers.
Step 5: Wait and Watch
Within hours, you’ll notice the leaves turning brown and shriveling. For tougher weeds, you may need to reapply the mixture after a few days.
Step 6: Repeat as Needed
Persistence pays off. Apply My Nana Swears By This DIY Weed Killer Recipe two or three times over a couple of weeks for deeply rooted weeds.
Tips + Tricks & More For Recipe Success
Even though My Nana Swears By This DIY Weed Killer Recipe is simple, a few pro tips can make it even more effective.
Use early in the season. Young weeds are easier to kill than mature ones.
Spray during full sun. The sun helps dry out weeds faster and improves the vinegar’s potency.
Avoid windy conditions. Overspray can damage nearby plants.
Target problem areas. Focus on driveways, sidewalks, and gravel paths where weeds thrive.
Store the mixture properly. Keep it in a labeled, sealed container in a cool, dark place for up to 3 months.
Don’t oversaturate the soil. While effective, too much salt can impact soil quality over time.
Rinse sprayers afterward. Vinegar can corrode metal parts if left inside the sprayer.
Following these best practices ensures My Nana Swears By This DIY Weed Killer Recipe remains an easy, eco-friendly way to maintain a weed-free yard.
How To Serve (Apply)
While “serving” might sound odd for a weed killer, this section focuses on the best application techniques for My Nana Swears By This DIY Weed Killer Recipe.
For Small Weeds: Use a handheld spray bottle for precision targeting.
For Large Patches: A garden sprayer is more efficient and ensures even coverage.
For Cracks & Crevices: Direct the nozzle at the base of weeds in driveways, sidewalks, and patio gaps.
For Thick Growth: Trim the top of taller weeds before spraying so the mixture can reach inner stems and leaves.
Consistency is key—reapplying weekly during active weed growth will keep them from reestablishing.
Serving Suggestions (Best Use Areas)
Because My Nana Swears By This DIY Weed Killer Recipe is non-selective, it’s best used strategically in specific areas where you don’t mind clearing all vegetation.
✅ Best for:
Driveways and walkways
Between patio stones or pavers
Gravel areas
Fence lines and garden edges
❌ Avoid using:
In flower or vegetable beds (the salt can damage soil health)
Near lawns or ornamental plants
Just before rain (the solution can wash away)
You can also complement My Nana Swears By This DIY Weed Killer Recipe with other natural weed control methods:
Boiling water – A quick fix for driveway weeds.
Corn gluten meal – Prevents new weeds from sprouting.
Mulching – Suppresses light, stopping weed growth naturally.
These alternatives extend the effectiveness of your natural weed management system while keeping your outdoor space chemical-free.
Time
One of the many reasons My Nana Swears By This DIY Weed Killer Recipe has remained a family favorite is its convenience. It takes only a few minutes to prepare but provides lasting results.
Preparation time: 5 minutes
Application time: 10–15 minutes for a medium-sized area
Visible results: Within 3–6 hours for young weeds; 24–48 hours for mature ones
Reapplication: Every 7–10 days, if needed
The quick action makes it perfect for weekend gardening or whenever those pesky weeds suddenly appear after rainfall.
Why You’ll Love My Nana Swears By This DIY Weed Killer Recipe
There’s something comforting about using a remedy passed down through generations. My Nana Swears By This DIY Weed Killer Recipe not only works wonders but also aligns with sustainable gardening practices. It’s cost-effective, safe for pets and kids (when used properly), and gentle on the planet.
You don’t need fancy store-bought products or harmful chemicals to maintain a beautiful yard. Sometimes, the best solutions are the ones that have been tested by time—and trusted by Nana.
Final Thoughts
If you’re tired of battling stubborn weeds and wasting money on toxic sprays, give My Nana Swears By This DIY Weed Killer Recipe a try. It’s an environmentally friendly, affordable, and incredibly effective way to reclaim your garden from invasive plants.
Made with just vinegar, salt, and soap, this humble blend proves that nature provides all the tools we need for garden care—no chemicals required. Whether you’re maintaining a flower garden, clearing a patio, or simply following in the footsteps of generations past, this recipe delivers real results with minimal effort.
After all, My Nana Swears By This DIY Weed Killer Recipe for a reason—it works, it’s safe, and it’s stood the test of time.