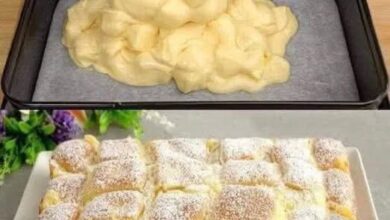
When it comes to indulgent desserts, few things compare to Creamy Fried Bombs. These golden pastries are crisp on the outside, pillowy soft inside, and filled with silky vanilla pastry cream.
They strike the perfect balance between comfort food and a bakery-worthy treat, making them a favorite for family gatherings, special occasions, or even a cozy weekend dessert.
If you have ever tasted Italian-style cream-filled bomboloni or custard-filled doughnuts, you already know how irresistible this type of dessert is.
What makes Creamy Fried Bombs stand out is their simple preparation, budget-friendly ingredients, and the fact that you don’t need fancy baking equipment to make them at home.
Whether you are a seasoned home baker or someone trying fried desserts for the first time, this recipe is approachable, foolproof, and unforgettable.
Why This Recipe Works
Soft and fluffy dough
The combination of bread flour, egg yolks, and butter ensures a tender yet elastic dough that fries up beautifully without becoming greasy.
Rich, creamy filling
The homemade pastry cream adds a luxurious flavor and velvety texture.
It’s thicker than custard but lighter than pudding, giving the bombs a bakery-style finish.
Versatile recipe
You can keep them classic with vanilla cream or experiment with chocolate, hazelnut spread, or even fruit jam fillings.
Crispy sugar coating
Rolling the fried bombs in granulated sugar adds a sweet crunch and balances the creamy interior perfectly.
Better than store-bought
These are fresher, fluffier, and more flavorful than anything you could buy at a bakery.
Ingredients You’ll Need
For the dough:
170 g warm milk
14 g fresh brewer’s yeast (or 5 g active dry yeast)
55 g sugar
335 g “0” flour (bread flour or all-purpose flour works too)
1 pinch of salt
2 egg yolks
40 g unsalted butter, softened
For frying:
Neutral oil like sunflower or vegetable oil
For the pastry cream filling:
500 ml whole milk
4 egg yolks
120 g sugar
40 g cornstarch
1 tsp vanilla extract
25 g butter
For finishing:
Granulated sugar for rolling
Step-by-Step Instructions
1. Prepare the Dough
In a small bowl, dissolve yeast in warm milk with a teaspoon of sugar. Let sit for 5–10 minutes until foamy.
In a larger mixing bowl, combine flour, remaining sugar, and salt. Add the egg yolks and butter.
Pour in the yeast mixture and knead until the dough becomes smooth and elastic. If using a stand mixer, this takes about 5 minutes. By hand, it may take closer to 10 minutes.
Cover the bowl with a clean cloth and let the dough rise for 1–2 hours, or until it doubles in size.
2. Shape the Bombs
Punch down the risen dough and roll it out to about 1.5 cm thickness on a lightly floured surface.
Use a cookie cutter or glass to cut circles about 6–7 cm wide.
Place the dough rounds on a lined baking tray, cover, and let rise for another 30 minutes.
3. Make the Pastry Cream
In a saucepan, warm the milk over medium heat until hot but not boiling.
In a bowl, whisk together the egg yolks, sugar, and cornstarch until smooth and pale.
Slowly pour the hot milk into the egg mixture while whisking constantly.
Return the mixture to the saucepan and cook on medium heat, whisking until thickened.
Remove from heat, stir in vanilla and butter, then cover with plastic wrap pressed directly onto the cream to prevent a skin from forming. Cool completely.
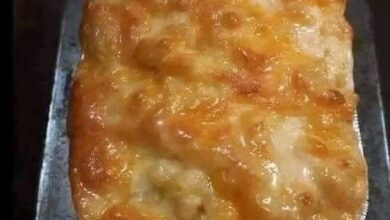
4. Fry the Bombs
Heat oil in a deep pot to 170–175°C.
Fry the dough rounds in small batches, cooking 1–2 minutes per side until golden brown.
Drain on paper towels, then roll in sugar while warm.
5. Fill with Cream
Transfer the cooled pastry cream to a piping bag fitted with a round tip.
Make a small hole in each fried bomb and pipe in a generous amount of cream.
6. Serve and Enjoy
These are best enjoyed fresh, slightly warm, with the filling oozing out of the first bite.
Tips for Success
Use bread flour if available. It has more protein and gives the dough extra structure.
Check your oil temperature with a thermometer. Too hot and they will burn outside but stay raw inside. Too cool and they will absorb oil.
Don’t overfill the piping bag. Filling the bombs is easier when you control the cream flow.
Cool pastry cream completely before piping to avoid melting the dough.
Eat the same day for the best texture. While they stay soft for a day or two, they lose their crisp sugar coating.
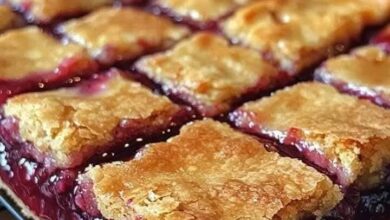
Variations to Try
Chocolate Cream Filling: Replace 40 g of cornstarch with 30 g cornstarch + 30 g cocoa powder.
Nutella Bombs: Skip pastry cream and fill with hazelnut spread.
Fruit-Filled Bombs: Use jam or lemon curd instead of cream for a lighter option.
Cinnamon Sugar Coating: Mix sugar with ground cinnamon for extra flavor.
Serving Suggestions
Breakfast Treat: Pair with a cappuccino or latte.
Party Dessert: Arrange on a platter with different fillings for variety.
Holiday Favorite: These bombs make an excellent festive dessert, especially during Christmas or Easter.
Kid-Friendly Snack: Children love the surprise filling inside.
Storage Instructions
Room Temperature: Store unfilled bombs in an airtight container for 1–2 days.
Refrigerated: Once filled with cream, store in the fridge and eat within 24 hours.
Frozen: You can freeze the unfilled fried bombs and reheat them in the oven before filling.
Why You’ll Love These Creamy Fried Bombs
They are budget-friendly compared to bakery desserts.
They are versatile and customizable with different fillings.
They are indulgent without requiring complicated techniques.
They taste homemade, fresh, and far more satisfying than store-bought doughnuts.
Final Thoughts
Making Creamy Fried Bombs at home is easier than you think. With a handful of simple ingredients and a little patience during the dough rising process, you get a dessert that feels luxurious, comforting, and celebratory.
The rich vanilla cream pairs perfectly with the fluffy dough and sugary coating, giving you the ultimate fried dessert experience.
Whether you are preparing these for your family, a special gathering, or a sweet weekend treat, this recipe guarantees smiles all around.
Once you try them, you’ll find yourself making them again and again, experimenting with new fillings, and sharing them with friends who will be amazed you made something this good in your own kitchen.