Perfecting Homemade English Muffins
There’s something comforting and satisfying about the aroma of freshly baked bread wafting through your kitchen—and when it comes to breakfast classics, Perfecting Homemade English Muffins takes the spotlight.
These golden, griddle-cooked beauties are soft, fluffy, and full of those irresistible nooks and crannies that hold butter, jam, or honey like little pockets of joy. If you’ve ever relied on store-bought versions, you’re in for a revelation.
Making Perfecting Homemade English Muffins from scratch might sound intimidating at first, but the process is easier than you think and far more rewarding.
In this comprehensive guide, we’ll explore exactly how to make the best Perfecting Homemade English Muffins right in your own kitchen. From understanding why the recipe works so well, to what ingredients and tools you’ll need, to expert tips and tricks that ensure perfect results every time, this article will transform the way you approach this beloved breakfast staple.
Why This Recipe Works
The secret behind Perfecting Homemade English Muffins lies in the combination of science and simplicity. The magic starts with the yeast, which creates that signature airy texture inside. The warm milk activates the yeast, giving rise to a dough that’s soft yet strong enough to trap tiny air bubbles.
When cooked on a griddle instead of baked in an oven, these muffins develop their iconic golden crust on the outside while staying tender inside.
The blend of all-purpose and whole wheat flour gives Perfecting Homemade English Muffins both flavor and structure. The all-purpose flour contributes to lightness, while the optional whole wheat flour adds heartiness and depth.
Cornmeal dusting enhances texture, creating that slightly crisp coating we all love. The balance of salt, sugar, and butter adds just enough richness without overpowering the subtle, wholesome flavor.
Finally, cooking low and slow ensures that every Perfecting Homemade English Muffins batch is evenly browned and perfectly cooked through. The result? A soft, chewy, delicious muffin that’s versatile enough for breakfast, brunch, or even dinner sandwiches.
What You’ll Need for This Recipe
To create Perfecting Homemade English Muffins, gather a few pantry staples and simple tools. You don’t need fancy equipment—just good technique and patience.
Ingredients:
2 cups all-purpose flour
1 cup whole wheat flour (optional, for a heartier texture)
1 packet (2 ¼ tsp) active dry yeast
1 tsp salt
1 tbsp sugar
1 cup warm milk (about 110°F or 43°C)
2 tbsp unsalted butter, melted
Cornmeal (for dusting)
1 egg (optional, for extra richness)
Equipment:
Mixing bowls
Whisk or wooden spoon
Measuring cups and spoons
Rolling pin
Round cookie cutter (or a glass)
Large skillet or griddle
Wire cooling rack
When you have these simple ingredients ready, you’re already halfway to Perfecting Homemade English Muffins success.
How to Make This Recipe
Step 1: Prepare the Yeast Mixture
In a small bowl, combine warm milk, sugar, and active dry yeast. Stir gently and let it rest for 5–10 minutes. The yeast should become foamy—a sign it’s active and ready to bring your Perfecting Homemade English Muffins to life.
Step 2: Mix the Dry Ingredients
In a large mixing bowl, whisk together all-purpose flour, whole wheat flour, and salt. Pour in the frothy yeast mixture, melted butter, and egg (if using). Mix until a sticky dough forms.
Step 3: Knead the Dough
Lightly flour your work surface and knead the dough for 5–7 minutes until smooth and elastic. This step develops the gluten, which gives Perfecting Homemade English Muffins their tender yet chewy structure.
Step 4: Let the Dough Rise
Place the dough in a greased bowl, cover it with plastic wrap or a damp cloth, and set it in a warm spot. Allow it to rise for 1 to 1.5 hours or until doubled in size. This slow rise is crucial for flavor and texture development.
Step 5: Shape the Muffins
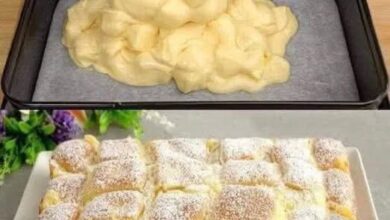
Punch down the dough and roll it out to about ¾-inch thick. Cut into 3-inch circles using a cutter or glass. Dust a baking tray with cornmeal and lay the rounds on top. Sprinkle more cornmeal over them, cover lightly, and let them rest for another 30 minutes.
Step 6: Cook the Muffins
Heat a skillet or griddle over low-medium heat. Carefully transfer the dough rounds to the pan, leaving space between each one. Cook for 5–7 minutes per side until golden brown and puffed. Covering the skillet helps cook them evenly. Your kitchen will smell heavenly as Perfecting Homemade English Muffins start to form their golden crusts.
Step 7: Cool and Split
Remove from heat and place the muffins on a wire rack. Let them cool for 15–20 minutes before splitting. For the best texture, use a fork instead of a knife to split them—this preserves the iconic nooks and crannies that make Perfecting Homemade English Muffins so irresistible.
Tips + Tricks & More for Recipe Success
1. Temperature Matters:
Always check your milk temperature—it should be warm, not hot. Around 110°F ensures the yeast activates properly without dying.
2. Don’t Rush the Rise:
Allow the dough to rise fully. This step gives Perfecting Homemade English Muffins their signature airy interior.
3. Avoid Over-Flouring:
Too much flour can lead to dense muffins. The dough should feel slightly tacky but not sticky.
4. Use Cornmeal Generously:
Cornmeal prevents sticking and adds that classic texture to the muffin’s crust.
5. Cook on Low Heat:
Cooking slowly ensures that the inside cooks through before the outside browns too much. If your muffins brown too fast, reduce the heat.
6. Fork-Splitting is Key:
Resist the urge to cut your muffins with a knife. Fork-splitting preserves their airy texture, perfect for butter and spreads.
7. Make Ahead and Freeze:
You can double the batch and freeze extras for up to three months. Simply reheat them in a toaster for that fresh-from-the-griddle taste.
How to Serve
Perfecting Homemade English Muffins are incredibly versatile. Their mild flavor and soft texture make them perfect for endless serving possibilities.
Classic Toasted: Split and toast the muffins, then spread butter, jam, or honey over the warm surface.
Egg Sandwiches: Layer with scrambled eggs, cheese, and bacon or sausage for a filling breakfast sandwich.
Sweet Treat: Drizzle with honey, dust with cinnamon sugar, or top with fruit compote for a sweet brunch twist.
Savory Snack: Spread with cream cheese and smoked salmon for a café-style treat.
Mini Pizzas: Use as a base for quick homemade pizzas—just add sauce, cheese, and toppings, then broil until bubbly.
However you serve them, Perfecting Homemade English Muffins always add warmth and comfort to the table.
Serving Suggestions
To elevate your Perfecting Homemade English Muffins, try pairing them with complementary dishes and beverages:
With Breakfast: Serve alongside scrambled eggs, avocado, and fresh fruit.
For Brunch: Pair with mimosas, fresh berries, and a side of yogurt.
As a Snack: Add peanut butter and banana slices for a protein-packed pick-me-up.
Dinner Companion: Serve with soups or stews to soak up hearty flavors.
For special occasions, consider making flavored versions like Perfecting Homemade English Muffins with herbs, cheese, or cinnamon raisin for variety and flair.
Time Breakdown
To plan your baking session efficiently, here’s a detailed time guide for Perfecting Homemade English Muffins:
Preparation Time: 20 minutes
First Rise: 1 to 1.5 hours
Second Rise: 30 minutes
Cooking Time: 15 minutes
Cooling Time: 20 minutes
Total Time: Approximately 2.5 hours from start to finish.
While the process takes time, most of it is hands-off, allowing you to enjoy a cup of coffee or prepare other dishes while the dough works its magic.
Storing and Freezing
Store Perfecting Homemade English Muffins at room temperature in an airtight container for up to four days. For longer storage, freeze them: wrap each muffin in plastic wrap and place them in a freezer-safe bag. When ready to serve, toast directly from frozen—no need to thaw. They’ll taste freshly made every time.
Variations for Creativity
Part of the fun in Perfecting Homemade English Muffins is experimenting with new flavors:
Whole Wheat Version: Use all whole wheat flour for a denser, nuttier muffin.
Sweet Cinnamon Raisin: Add a tablespoon of sugar, cinnamon, and a handful of raisins.
Cheddar & Herb: Mix grated cheddar and chopped herbs like chives or rosemary for savory muffins.
Garlic Butter Muffins: Brush with garlic butter after cooking for an irresistible twist.
Each variation maintains the tender crumb and delicious flavor that makes Perfecting Homemade English Muffins such a timeless favorite.
Why Homemade Beats Store-Bought
There’s no comparison between homemade and store-bought muffins. When you make Perfecting Homemade English Muffins, you control the ingredients, texture, and flavor. No preservatives, no artificial additives—just fresh, wholesome goodness. Plus, nothing beats the pride of serving your family muffins made entirely by hand.
Store-bought versions might save a few minutes, but they can’t replicate the warmth, aroma, and satisfaction that come from making your own batch of Perfecting Homemade English Muffins.
Final Thoughts: A New Breakfast Tradition
Perfecting Homemade English Muffins isn’t just about following a recipe—it’s about creating something that connects you to the comforting ritual of baking. The process may require time and care, but the result is so worth it. Imagine pulling warm, golden muffins from your skillet, splitting them open to reveal the soft, fluffy center, and watching butter melt into every nook and cranny.
Once you try this recipe, you’ll never go back to store-bought. With each batch, you’ll get better at shaping, cooking, and customizing your muffins until they’re exactly how you like them.
Perfecting Homemade English Muffins will soon become a cherished part of your weekend routine, a breakfast tradition your family will look forward to again and again.